1. THE OUTCOME
You will end with a Google Contacts list you can trust as your safe-sender source: duplicates merged, junk/autocreated entries removed, risky sync sources paused, and your “good senders” clearly labeled. After this, a strict allow‑list approach becomes practical: contacts = allowed, everyone else = screened.
This is the opposite of “spam filters that guess.” It’s deterministic: you decide who is allowed once, then your inbox stays quiet. (More on the methodology shift in Deterministic vs Probabilistic Email Filtering for Executives.)
2. BEFORE YOU START
- Required: Access to the correct Google account at contacts.google.com (personal Gmail or Google Workspace user)
- Required (recommended): Desktop browser (Chrome 124+, Edge 123+, Safari 17.4+)
- Required: Temporarily disable ad/tracker blockers (some hide the Settings gear or action menus)
- If Google Workspace: You need standard user access to Contacts. Admin-only controls are separate.
- Optional but helpful: A clear definition of “safe sender” (examples: clients, investors, teammates, family)
- Time estimate: Core audit ~15–30 minutes. Deep cleanup + labeling ~45–75 minutes.
Do not start merging or deleting until you export a backup. Google can undo changes, but a backup is your safety net.
3. THE STEPS
Step 1: Confirm you’re in the right Google account
Open contacts.google.com and check the profile avatar in the top-right.
If it’s wrong, click the avatar → Sign out or Switch account → select the correct account.
Expected result: Your name/email in the avatar menu matches the account that receives the email you want to protect.
If you run multiple accounts (personal + Workspace), open an Incognito/Private window and sign into only the target account.
Step 2: Export a full backup before you touch anything
Click ⋮ More (top area) → Export → choose:
- Contacts to export: All contacts
- Format: Google CSV (best for review) or vCard (best for re-import)
Then click Export and save the file.
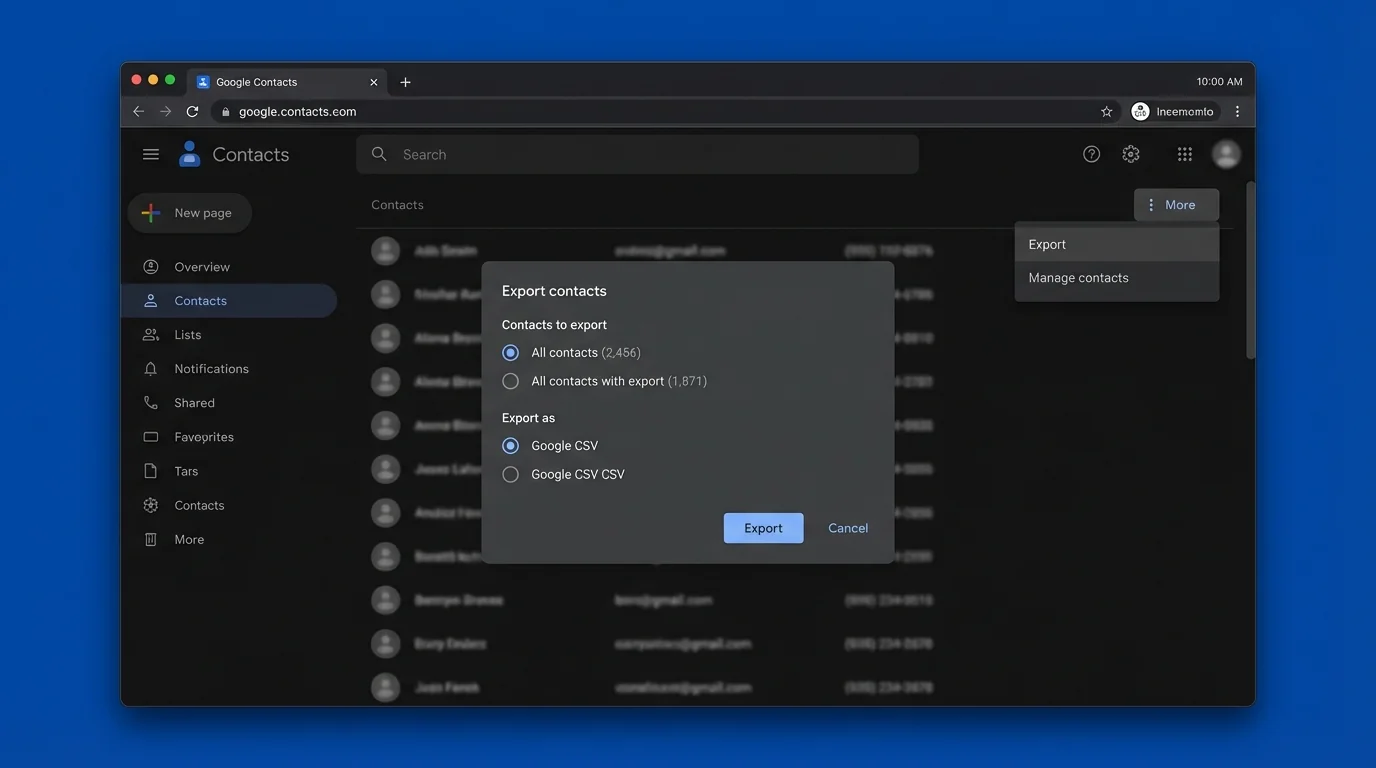
Expected result: You have a downloaded backup file on your computer.
Name it with a date, like google-contacts-backup-2026-03-25.csv. You will thank yourself later.
Step 3: Switch to the one view that makes dedupe actually work
In the left sidebar, click All contacts (not Contacts, not a label).
This matters because Google’s merge suggestions can change based on which list you’re viewing.
Expected result: The main list shows your complete dataset, with a total count at the top.
Step 4: Merge duplicates using Google’s native engine
Click Settings (gear, top-right) → Merge duplicates.
In some UI variants, you’ll see Merge & fix in the left sidebar under “Fix & manage.” Use whichever appears.
Review the suggestions:
- Click Merge all (fast)
- Or click Merge / Dismiss per suggestion (safer if you have many same-name contacts)
Expected result: Duplicate cards collapse into a single contact that retains combined fields (phones, emails, addresses, notes).
If you have two different people sharing an email domain and similar names (e.g., alex@company.com), review merges one-by-one. Wrong merges create “Franken-contacts” that break safe-sender logic.
Step 5: Undo merges fast if something looks wrong
If you merged incorrectly, open the left menu ≡ → click Undo changes.
Pick a time range (example: 10 minutes ago) and confirm.
Expected result: Your contacts revert to the earlier state within that window.
Treat Undo changes like a “revert commit.” Use it immediately after a mistake instead of trying to manually unpick merges.
Step 6: Remove auto-created noise that bloats your allow-list
This step prevents your safe-sender list from quietly filling with random addresses.
6A) Stop Gmail from auto-creating contacts
Open Gmail → click Settings (gear) → See all settings → General tab.
Find Create contacts for auto-complete and set it to I’ll add contacts myself.
Scroll down → click Save Changes.
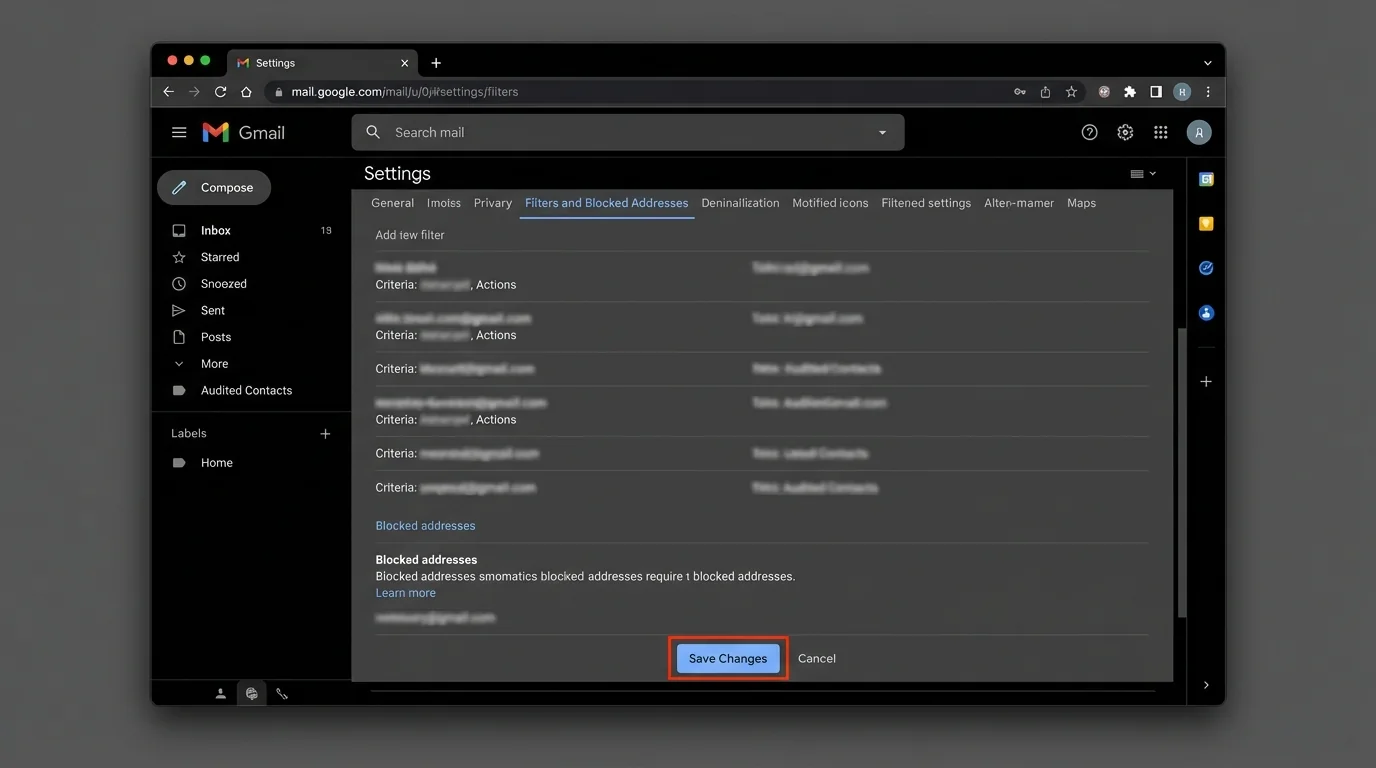
Expected result: Gmail stops adding “one-off” senders to Contacts just because you typed an address once.
6B) Disable “add contacts from messages” (Android) if enabled
On Android (wording varies by device):
- Settings → Google → Account services → Contacts sync/settings
- Look for a setting like Add contacts from messages and turn it Off
Expected result: Your phone stops generating low-quality contacts from signatures, threads, or message apps.
If you can’t find it, search your phone settings for contacts and add contacts.
Step 7: Pause external sync sources while you clean
Most “duplicates keep coming back” problems are sync loops: you clean on the web, then a device re-uploads old duplicates.
7A) Pause iPhone/iPad contact sync (if applicable)
Go to iOS Settings → Contacts → Accounts → Gmail/Google → toggle Contacts Off.
7B) Pause Android contact sync (if applicable)
Go to Android Settings → Passwords & accounts (or Users & accounts) → select your Google account → toggle Contacts Off.
Expected result: Contacts stop changing in the background while you audit.
Pausing sync is temporary. Re-enable it only after your web contacts look correct, or duplicates can reappear immediately.
Step 8: Audit “Other contacts” so strangers don’t become “safe” by accident
In Google Contacts, click Other contacts in the left sidebar.
This list often contains:
- One-time email recipients
- Auto-saved addresses from older settings
- Entries imported by apps
Select obvious junk entries → click Delete (trash icon).
Expected result: “Other contacts” shrinks and stops acting as a backdoor into your safe-sender universe.
If you don’t want to delete yet, move questionable entries into a label like Review first (next step).
Step 9: Create labels that match how you grant trust
Safe-sender lists fail when “good” is undefined. Labels make trust explicit.
In the left sidebar, click Create label and add 3–5 labels such as:
- VIP
- Clients
- Team
- Vendors
- Personal
Then bulk-apply labels:
1. In All contacts, check the boxes next to multiple contacts
2. Click Manage labels (label icon) → select the label(s)
Expected result: Your trusted senders are grouped in a way you can audit later in minutes.
Use labels as “trust tiers,” not as an org chart. If someone emailing you should always reach you, they belong in VIP.
Step 10: Verify every contact has the right email field populated
A contact without an email address is useless for safe-sender filtering.
Click a label (example: Clients) → spot-check 10–20 contacts:
- Open a contact
- Confirm the sender’s real address is under Email (not hidden in Notes)
- Add missing emails
Expected result: Your important contacts consistently have correct Email fields.
Don’t assume “name match” equals “sender match.” Filters and allow-lists typically rely on the exact email address, not the display name.
Step 11: Remove or isolate role accounts and shared inboxes
Role accounts can be safe, but they are also easy to spoof if you rely on names.
Examples:
- support@company.com
- billing@vendor.com
- noreply@service.com
Action:
- Put role accounts in a separate label like Role-Addresses
- Decide if they belong in your safe-sender set
Expected result: Your allow-list doesn’t silently expand to “every automated sender you’ve ever touched.”
Step 12: Revoke third-party apps that can rewrite contacts
Go to myaccount.google.com → Security → Third-party apps with account access.
Review apps that mention Contacts permissions.
- Click an app → Remove Access if you don’t fully trust it or don’t need it.
Expected result: Fewer hidden systems can create duplicates or inject garbage into Contacts.
This is also a security move: a compromised app with Contacts access can poison your safe-sender list.
Step 13: Re-enable sync carefully and confirm duplicates don’t return
Turn contact sync back on (iOS/Android), then wait 2–5 minutes.
Return to contacts.google.com → All contacts → check if counts jump or duplicates reappear.
Expected result: Sync resumes and your clean list stays clean.
If duplicates reappear after re-enabling sync, stop. Your device/app is re-uploading old data. See Troubleshooting.
Step 14: Schedule the audit so your allow-list stays reliable
In Google Contacts, click Settings (gear) and enable Notify me when duplicates are found if available.
Add a recurring calendar reminder (monthly is enough for most people).
Expected result: Your safe-sender list remains stable without big cleanups.
4. COMMON PATTERNS (real-world templates)
Use these patterns to decide what belongs in Contacts (allow) versus what should stay out (screen).
Pattern 1: Newsletters you read but don’t trust
- Keep in Contacts? No
- Reason: Newsletters are frequent attack surfaces and often change sending addresses.
- Better approach: Use labeling/filters for newsletters after they arrive, not allow-listing.
Copy-paste examples for Gmail search (for review, not allow-list):
- from:(*@substack.com)
- list:(*@mg.sender.service)
Pattern 2: Vendors that send invoices
- Keep in Contacts? Yes, but label
- Label:
Vendors - Rule: Only add if you expect money/contract documents from them.
Data to store in the contact:
- Email: billing@vendor.com
- Notes: Account #12345, renewal month: Oct
Pattern 3: Investors and press inbound
- Keep in Contacts? Only after verification
- Label:
VIPorInvestors - Rule: Add once you’ve confirmed identity (calendar invite, intro, prior thread).
Pattern 4: Internal teammates (Workspace)
- Keep in Contacts? Yes
- Label:
Team - Rule: Prefer directory identities, not personal Gmail addresses.
Related: if you need tighter internal trust boundaries, use access levels and groups (see How to Restrict Internal Email Access Levels in Google Workspace).
5. THE BETTER WAY (KeepKnown Protocol)
Manual safe-sender hygiene breaks for one reason: it depends on constant attention. You clean contacts, then:
- a device syncs junk back in
- Gmail auto-creates new entries
- a third-party app writes to Contacts
- you get tired and stop maintaining the list
That’s why “Open Inbox” fails. It creates decision fatigue and notification anxiety because every stranger can still reach you.
Methodology shift: from guessing to knowing
- Bad methodology: algorithmic sorting, blacklisting, spam filters, AI tabs that guess
- Good methodology: strict allow-listing (contacts-first), deterministic screening
KeepKnown implements the contacts-first approach at the API level (not a plugin). Once connected, it:
- Checks whether the sender is in your trusted set
- Moves non-contacts out of your primary flow into a dedicated label: KK:OUTSIDERS
- Keeps your inbox for known senders, not for everyone on the internet
This is the operational version of “inversion”: only allow the good.
If vendor security is part of your evaluation, KeepKnown uses OAuth2, is CASA Tier 2, and uses encrypted hashing rather than storing plaintext content (see CASA Tier 2 For Email Vendors).
To compare safe-sender strategies at an executive level, read:
- VIP Lists vs Strict Allow Lists for Executive Email
- Best Email Filtering Methods Compared (and Why Strict Allow‑listing Wins)
KeepKnown details and setup live at https://keepknown.com.
6. TROUBLESHOOTING
Use this section when something feels “haunted.” Most issues are predictable.
If Merge & Fix shows no duplicates, but you can see duplicates
Then: You’re likely not viewing the full dataset or a UI element is blocked.
- Click All contacts (left sidebar)
- Disable ad/tracker blockers for contacts.google.com
- Refresh the page and reopen Settings → Merge duplicates
If duplicates reappear immediately after you cleaned
Then: A device or app is re-syncing old data.
- Turn off contact sync on the device (Step 7)
- Go to myaccount.google.com → Security → revoke third-party access that can edit Contacts
- Clean again on the web
- Re-enable sync only after the web view stays stable
If contacts “disappear” after merging or deleting
Then: You likely applied a bulk action in the wrong view.
- In Google Contacts, open ≡ → Undo changes
- Restore to 10 minutes ago (or the closest safe window)
- If needed, re-import your backup: ⋮ More → Import
If your phone still shows duplicates but the web is clean
Then: Your phone’s contacts app may be caching old entries.
- Force close the contacts app
- Clear cache (Android) or restart the device (iOS)
- Confirm the device is using the same Google account you audited